Company Class
Overview of how to use add and edit company benefit classes.
Note: Classes are only enabled on sites that use Namely for payroll and/or benefits
ACCESSING COMPANY CLASSES
To access company classes:
-
In the navigation menu, click Company.
-
Click Settings.
-
Click Classes.
Note: Your ability to access company classes is determined by the Company settings classes permission in your organization’s roles and permissions. All users with the Administrator or HR Administrator roles, whose sites were created after August 12, 2019 have the permission turned on by default, however, it can be turned on or off for any access role as needed.
DEFAULT CLASSES
All new sites have two classes created by default, Full Time and Part Time.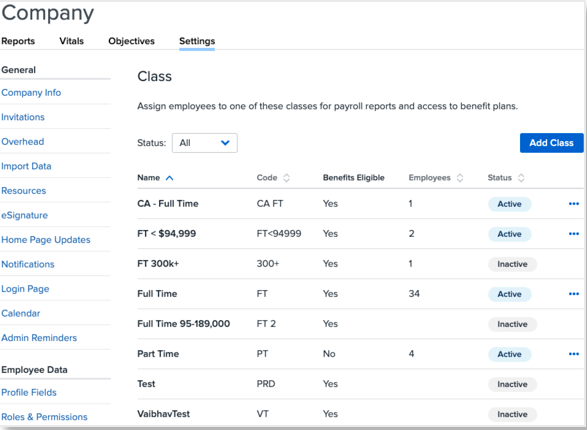
By default, neither class is eligible for benefits, however, all default class settings, including the class’ name, code, and benefits eligibility, can be edited at any time.
ADDING A CLASS
Refer to this video: Adding a class
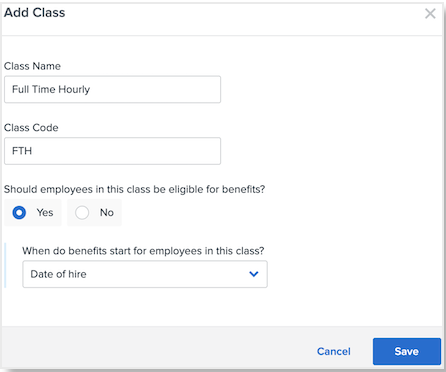
To add a new class:
-
Click Add Class.
-
Enter a Class Name.
-
You can’t enter a class name that is the same as an already active or deactivated class.
-
The class name can’t be greater than 50 characters.
-
The class name can include spaces, letters, numbers, and symbols.
-
-
Enter a Class Code.
-
You can’t enter a class code that is the same as an already active or deactivated class.
-
The class code can’t be greater than eight characters.
-
The class name can include spaces, letters, numbers, and symbols.
-
If you select Yes, and are a benefits client, select when benefits for the employee start:
-
-
Select whether employees in the class are eligible for benefits.
-
On the date of hire
-
On the first of the month following a defined number of days or months
-
If you select this option, you’ll also have to select whether the employee has to wait an additional month if the wait period ends on the first day of the month.
-
-
On the first or 15th of the month (whichever comes first) following a defined number of day.
-
If you select this option, you’ll also have to select whether the employee has to wait an additional month if the wait period ends on the first day of the month.
-
-
An exact number of days or months following the date of hire
-
-
Click Save.
EDITING A CLASS
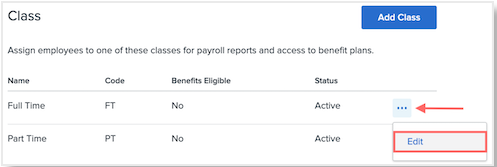
To edit a class:
-
Click the three dots next to the class you want to edit.
-
Click Edit.
-
Make any desired changes to the Class Name, Class Code, or benefits eligibility.
-
Click Save.
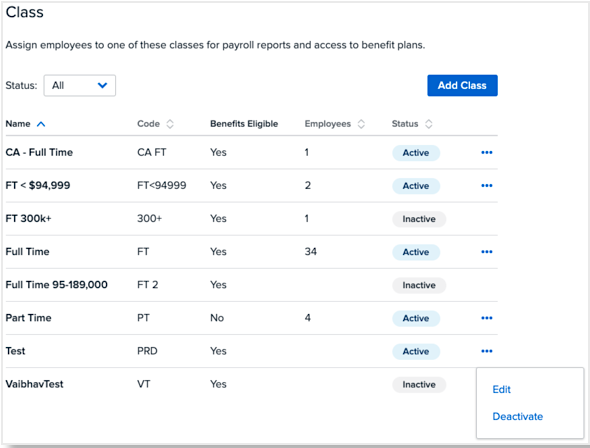
DEACTIVATING CLASSES
You can deactivate classes that don't have any employees associated with them.
To deactivate a class:
-
Click the three dots next to the class you want to deactivate and select Deactivate.
-
Confirm that you want to deactivate the class by clicking Yes, Deactivate.
COMPANY CLASS IN PAYROLL
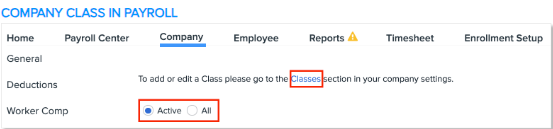
Your company’s classes can be viewed in Payroll by going to Company > Class, however, you can’t add any new classes, or make any changes to existing classes—access is read-only.
-
To view all classes at your company, including deactivated ones, select All.
-
To view only active classes, select Active.
If you need to make changes to your classes, click the Classes link in the note at the top of the page to be brought to HRIS.
Multi-EIN Clients
If you have multiple payroll companies, your classes are shared among your EINs. Any classes created in HRIS will flow into each of your subsidiaries’ payroll sites with no additional setup required.